
Battery Connections Illustrated
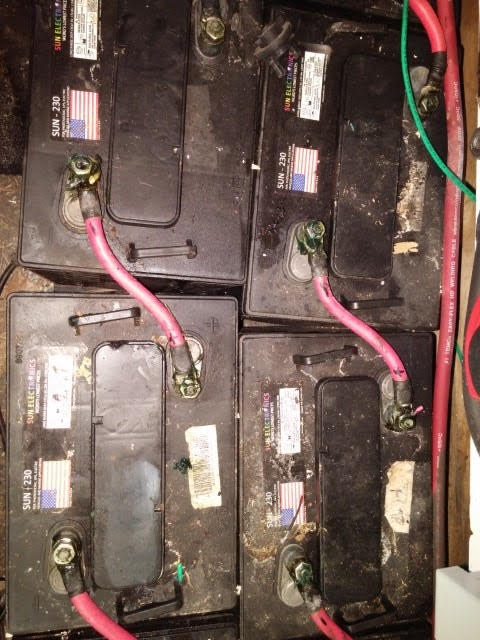
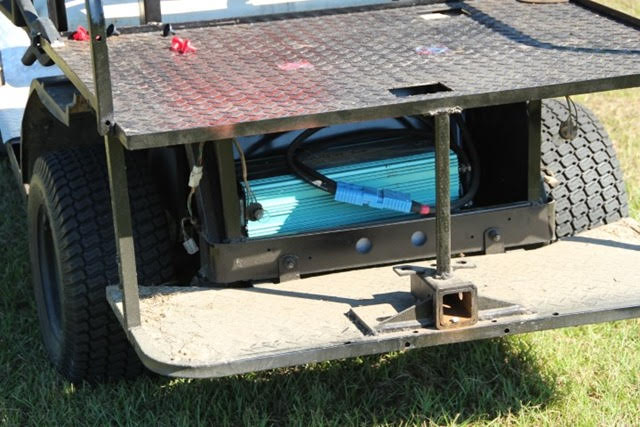
Elsewhere in the blog page is a post about battery safety. I have a couple of battery photos to illustrate what I was talking about the other day, easily making battery polarity easier to see. The old 24v battery strings have decent cables, grease to seal out corrosion, but they are a bit dirty and it is hard to see the polarity, should I need to reconnect anything. You can see where I marked the 2 gauge cables + and –.
The batteries do get cleaned up every time I add water and it is about that time.
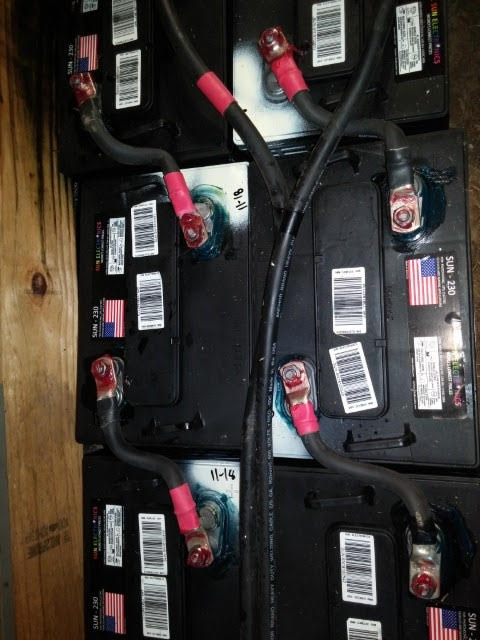
Here’s the new set for the 48v system, with painted corners to mark polarity, color coded heat shrink on the 2/0 cable terminals, dates on the batteries, grease on the seal and the terminals. This is much easier to identify things. In lieu of shrink tubing, you can get electrical tape in different colors, too. Batteries are the SUN230 golf car style from Sun Electronics.
When the new wall goes in for the power room, I will build a proper battery box to keep out the dust and dirt. I use plywood and 1×2 strips painted with latex paint. My last battery box was nearly 30 years old with no acid damage because latex paint is acid resistant! The original battery rack was steel and was in pretty bad shape after those years. I have gone to wooden racks and they seem to work well. I’ve never had any worry about fire, but lining the box with latex painted drywall will ensure that nothing burns.
The floor gets painted with latex, too, and I put in a layer of vinyl flooring. I leave a dusting of baking soda on the floor, just in case, and keep a box or two of baking soda around to neutralize any acid spill. Of course, John sells sealed batteries if you want to avoid that issue.
By Neal Collier
In defense of crappy free solar roof tiles
John’s right, the quest for attractive and practical rooftop solar with these tiles was a flop. Some of it was design flaw and some of it was improper installation. I hope Mr. Elon Musk, who is marketing solar roofs, has investigated this matter lest his quest should fail as well.
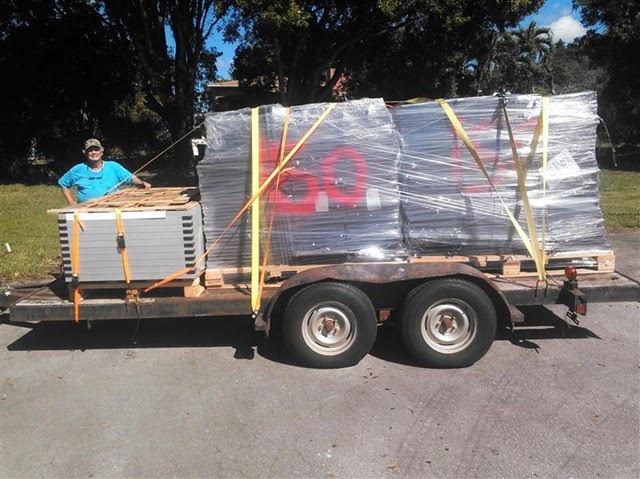
Stan-the-Hermit poses with 10 conventional panels for his cabin power upgrade and 300 roof tiles at the old Miami Gardens store.
I know about the tile problems because I have hundreds of these tiles. No solar panel works well when it is hot. Screwing them to a plywood deck leaves no space for cooling air circulation, inviting poor performance, at best. The heat also affected the wiring, some of which was made with insulation that lacked the proper plasticizers, so it just crumbled away. The heat and a poor choice of sealant caused the glass to separate from the cells, on some, allowing moisture to corrode busbar connections. The way roof shingles are installed, you can’t just pull out a bad one and replace it. You have to remove everything above it to get to its 4 screws. If one of a string of 200 goes bad, then you have no power. And, let’s not overlook a worker’s ability to screw something up. Many of the tiles I got never had all of the screws installed and some had pinched wiring. Combine high heat, 600 volt string potential and bad or crimped insulation and you are just asking for trouble. While none of these tiles ever burned down a house, there were a few smokers.
Then, consider their deinstallation. Very few I have received did not have the imprint of a size 11 boot in the grime on the glass. They were walked on, stomped on, thrown off the roof and piled high, sometimes with screws still in them. A few were hit with hammers. The result was some broken cover glass and most have cracked cells.
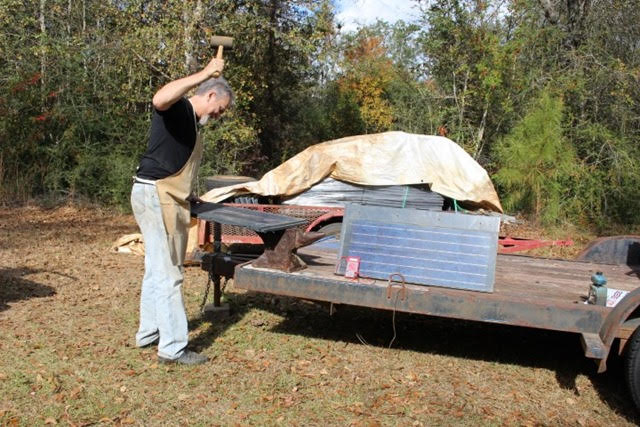
Some recycled roof tiles may require adjustment before use.
So, why would anyone want any of these? For one thing, they are pretty much free. For another, even if they don’t work, you can cut off the wires and make a good roof for a shed or carport. I’d reroof my 50×64 barn if a container of duds showed up at my place. The thing is, though, a lot of them do work and making a few changes in how they are used can make them practical.
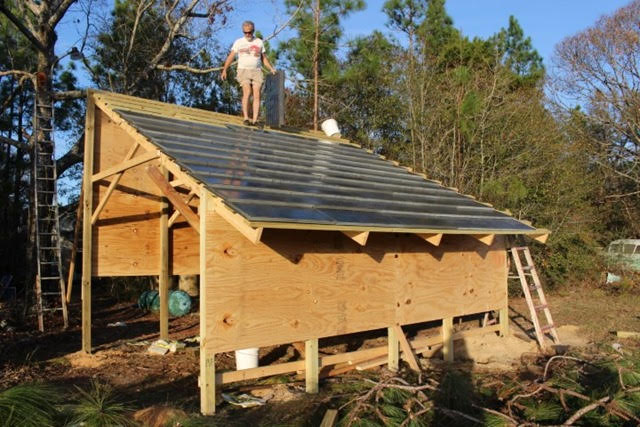
First of all, don’t put them on your house. That is a contractual term of acquiring them. A shed, lean-to or outhouse is ok. One guy was going to mount them on a radio tower! In shed construction you don’t need to use a roof deck. Put up trusses or rafters (the sloping bits) and string 2×4 purlins across them at the appropriate spacing and start screwing down the panels with deck screws. This gives cooling air circulation underneath. It also gives access to the wiring so you can simply bypass one that fails with an MC3 jumper cable. No muss, no fuss.
This is how I’d do it. Just sayin’…. Solar Shed, phase one. If you don’t need a shed, use shorter posts.
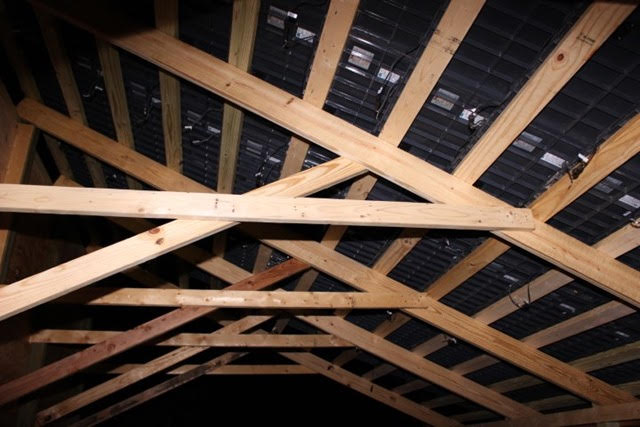
Easy access to the wiring. Easy construction.
Then, connect a modest number of these low voltage modules in series as appropriate for your charge controller. In my Solar Shed project, I use strings of 21 on the 30 amp MPPT controllers on my 24v system and 4 strings of 21 for my 60 amp controllers on the 48v system to which I am transitioning.
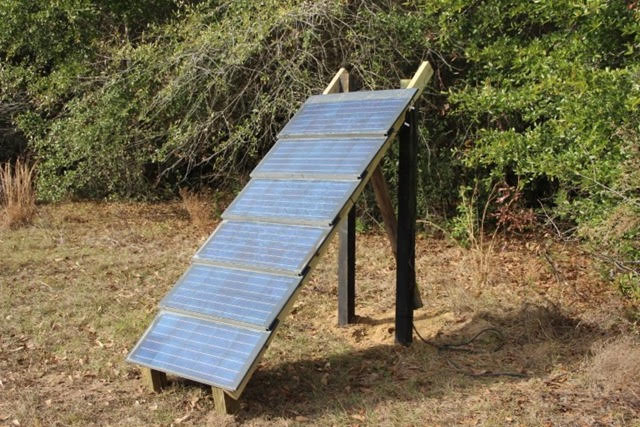
For a barn power supply and a water pumping station, I install two 4×4 posts about head high and two shorties, with 2×4 inclines between the tall and the short. The shingles are screwed to those. 3 shingles make about 100 watts at 12v with a cheapo on/off charge controller. You can add blocks of 3 to your heart’s content.
This easy setup runs my backup water pump at the far reaches of my property. 24 volt pump and no battery. A similar setup, with battery, lights my barn.
Back at the Solar Shed, on the first 16′ section I learned to avoid the panels with delaminated edges. They are trouble. I did not put up any with broken glass, but accidents happen and I have a broken one. It does not leak and it makes electricity. Because I have access from below, I have been able to jumper out two of the delaminated ones that quit. Their bypass diodes should have done this automatically, but it seems the heat was not good to the diodes. A $20 infrared thermometer gun lets me check for hotspots underneath.
The second 16′ section has had no failures. The new 38′ section, so far, does not have a single panel that does not contain cracked cells. Want to know a little secret? As long as the silver strands are intact, cracked cell perform better than whole cells? Will they last? Who knows. Live for today!
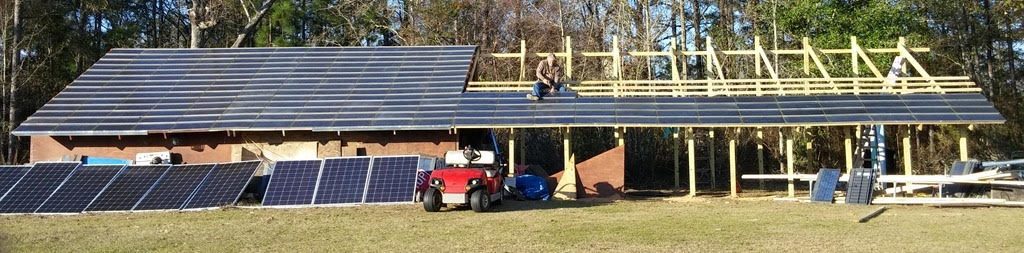
Phase 3 of the Solar Shed in progress, as of last week. The big panels are for the Solar Yacht project hardware evaluation. Yeah, a Phase 4 is planned.
Live for today! Phase 3 of the Solar Shed in progress, as of last week. The big panels are for the Solar Yacht project hardware evaluation. Yeah, a Phase 4 is planned.
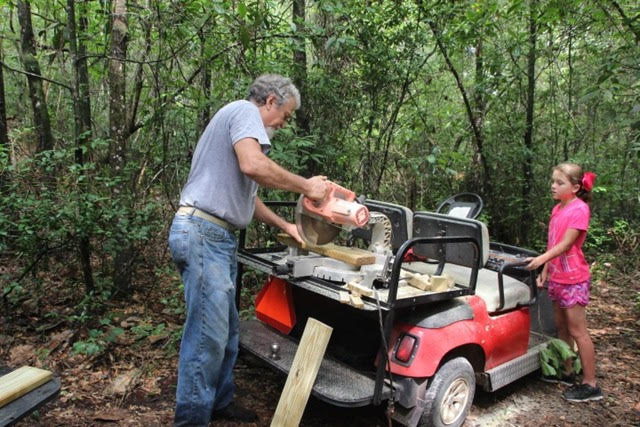
Is it practical? You decide. I charge my fleet of two electric farm vehicles, reworked golf cars. They allow me portable electrical and mechanical power over the entire farm. I run lights and tools at the solar shed, even a 2hp air compressor. I welded up the solar jalopy with this power. All construction on the shed was done with solar power (the first section power came from my solar boat). A line goes underground to the house to the emergency power circuit I had for the generator and battery backup, so my lights, office and kitchen are powered by these crappy plastic roof tiles. That’ll be 11KW of cheap plastic power when the current section is done, which means free air conditioning this coming summer!
Take your solar power with you with an inverter-equipped solar-charged electric farm jalopy.
Building the bridge to nowhere with portable solar power.
In the unlikely event that all of the panels quit, I’ll still have a useful shed with a free roof. There are plenty of others who dragged these home. How are you using them? –Neal